

How To Add A Picture In Photoshop
Insert an object/a person into a picture in Photoshop
Insert an object/a person into a picture in Photoshop.
Sometimes, you want to put a certain object or a person into a different picture. In Photoshop you can do this! In a previous tutorial, we already explained how to remove an object/a person from a background in Photoshop (click here). It is clear that this is normally always the first step to take before being able to insert that selected object or person into another picture. As you will see in this tutorial, we have added a shadow to our inserted object to make things more believable and realistic. We don't go further into this in the tutorial provided here, because it would be too extensive. If you want to know how we added shadow to an object, click here. It is a rather important step! Now let's find out how we inserted that scooter into a desert picture using Photoshop.

Summary
More Profound: How to insert an object/a person into a picture in Photoshop
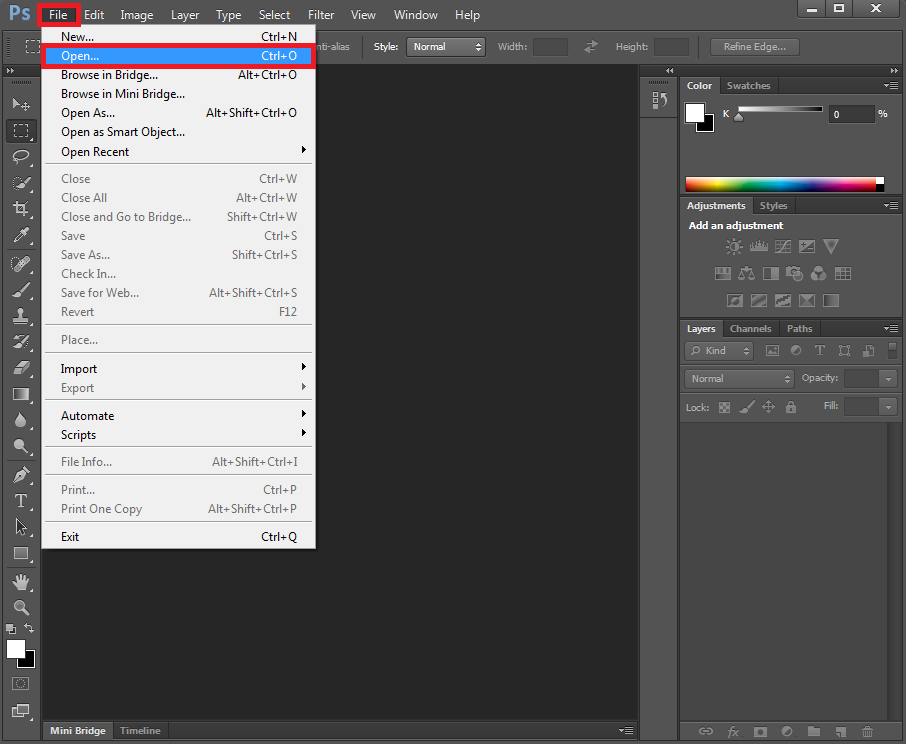
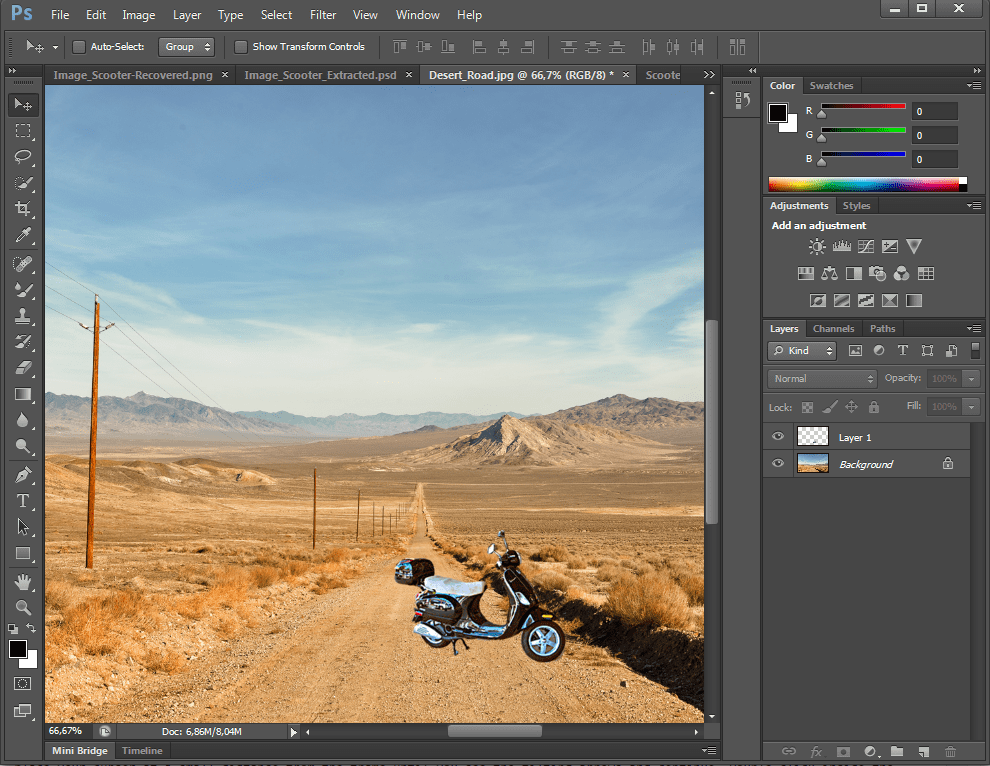
As stated, we already extracted the object, a scooter, from its original background in a previous tutorial. Now we want to insert this object into a different picture. Start by opening Photoshop. Click 'File' and then 'Open' to browse your computer to get the image that you want to edit into Photoshop (or simply press 'CTRL O' on your keyboard). Or you can browse your computer or external drive to find that specific image, right-click the image and select 'Open With' Photoshop. In this case, we have to do this twice! You want to get the image with only the selected object/person opened in Photoshop and you want to get the picture in which you want to insert this object/person opened in Photoshop. Don't worry if you don't see both picture in the same window! They appear in different tabs.
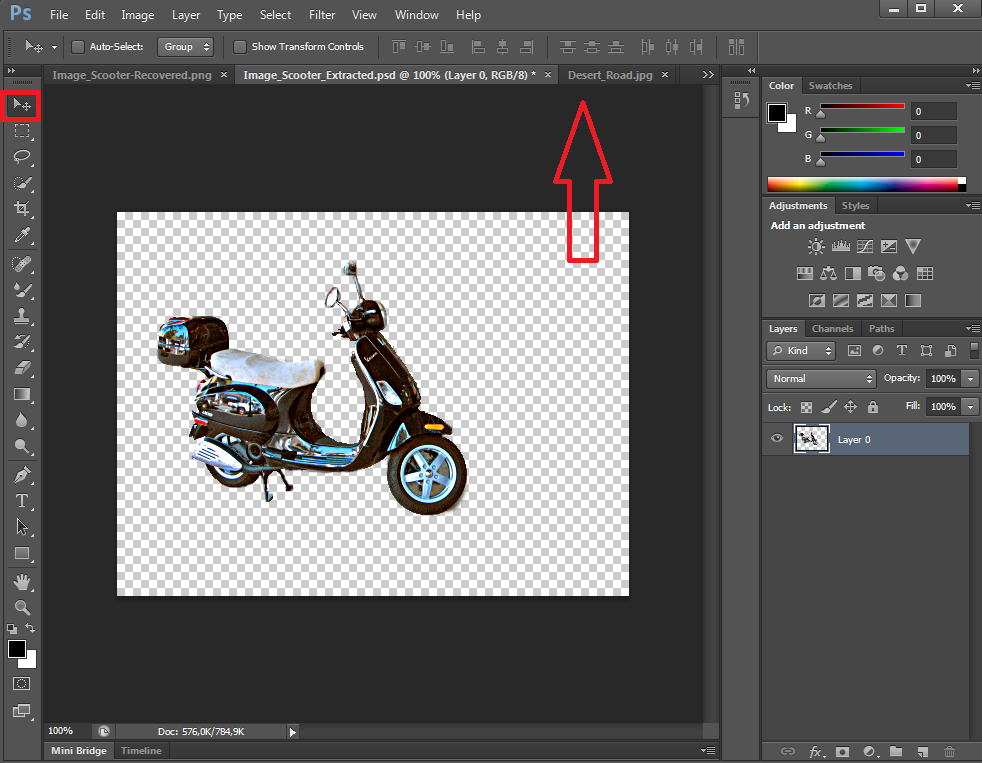
Now that your two pictures are opened in Photoshop, start with the picture with the selected object in it. Simply click the 'Move Tool' in the list left in Photoshop, select your object (or person) and drag it into the tab that contains the picture in which you wish to insert your object (or person).
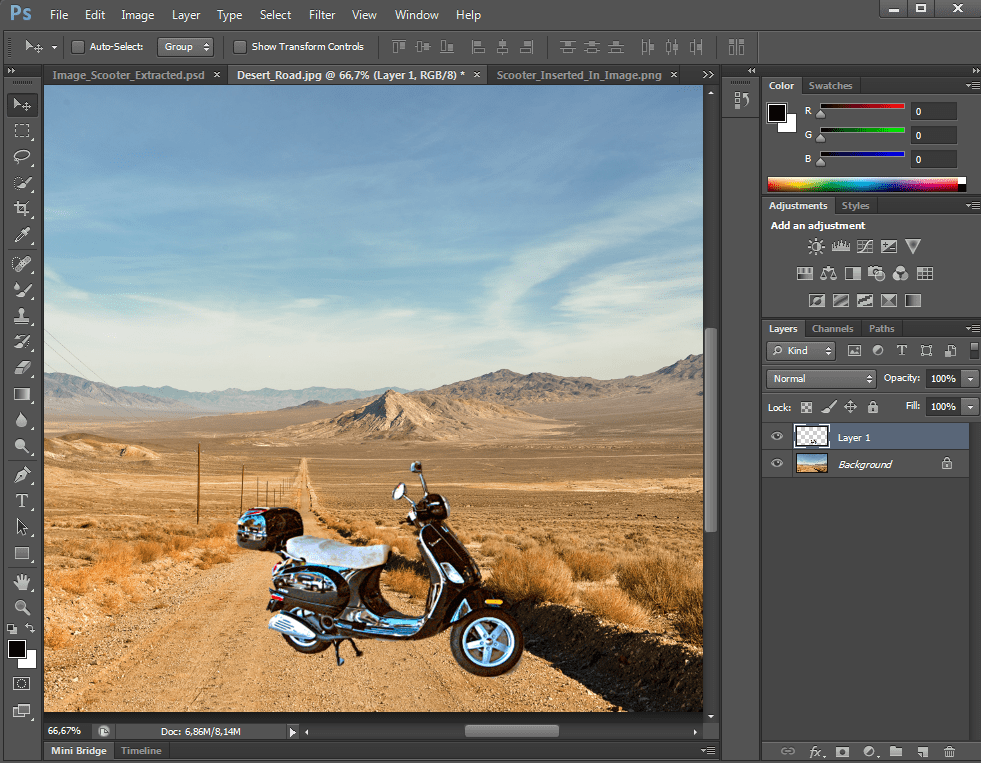
As you can see in our example, the scooter is way too big to realistically fit into the other picture.
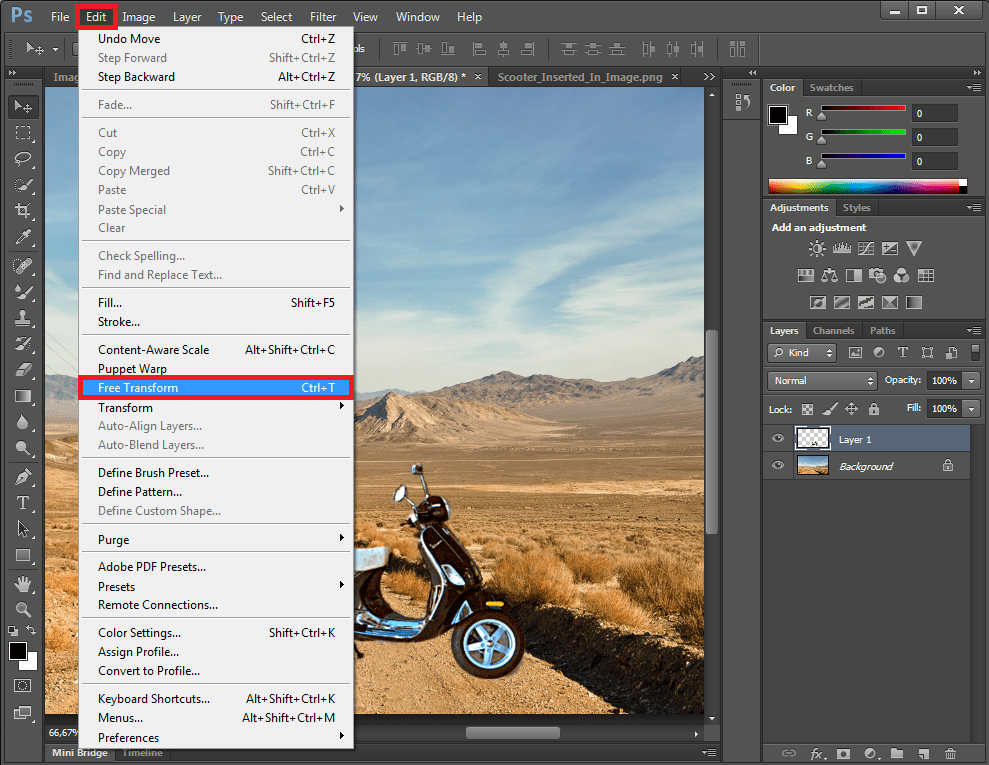
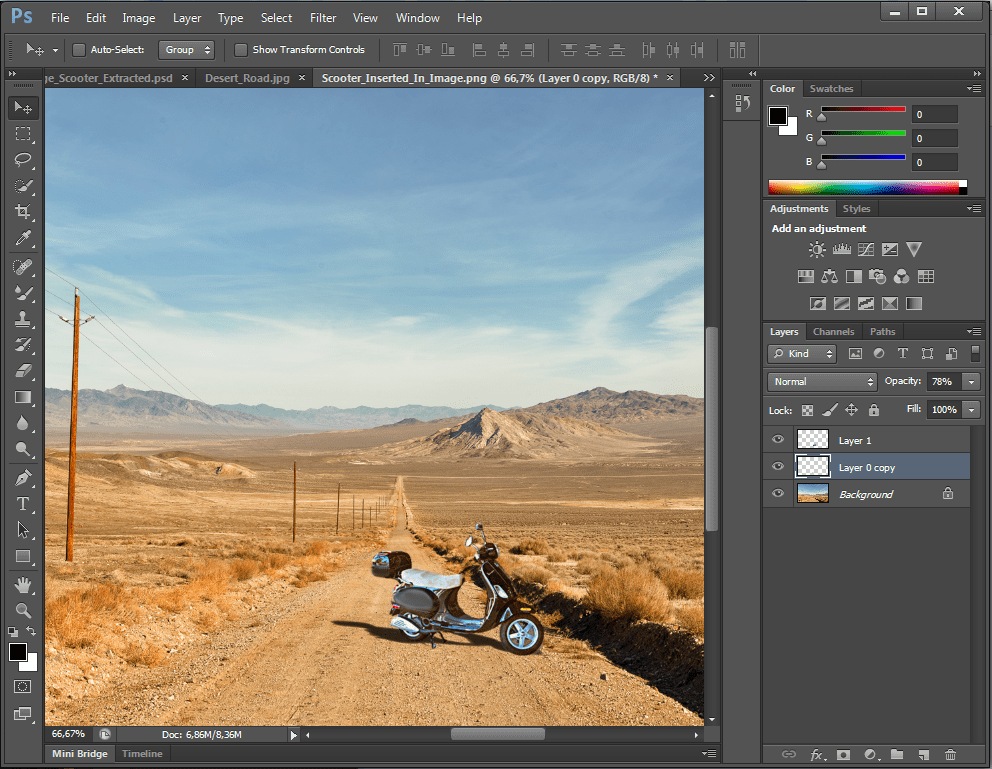
To fix the size of your inserted object (or person), the tilt of it (imagine inserting the scooter on a steep hill) and also the general placement of it (you can also use the 'Move Tool' to get placement right), click 'Edit' and then 'Free Transform', or use the shortcut and simply press 'CTRL T' on your keyboard.
A transform frame now surrounds your object (or person). To fix the size of the object (or person) without altering the general look, make sure to transform it scaled, placing your cursor at the corners of the frame to resize. To tilt your object, place your cursor at a small distance from the frame until you see the tilting arrows and continue. Double-click inside the frame to end if you are happy with your changes. You can always transform things later again. As you can see in the following result, the scooter is now nicely scaled down to fit the background. But would you believe that this scooter actually stood there in the middle of the desert? No right?! Things definitely do not look realistic and believable. When you insert an object or person into a picture in Photoshop, always remember to make some final important alterations. Below we will show you how our example looks after some necessary changes.
As you can see, we made our object a bit less sharp to not stand out too much like it did before. We also used a brush over some parts of the scooter to conceal the reflection of cars. (In our original image from which we extracted the object, the scooter was located in a street with cars. Not very desertlike, right?) Most importantly, we added a shadow. Adding a shadow is most definitely the most important thing to do when you insert an object/a person into a picture in Photoshop! Make sure that the shadow is correct and realistic and your whole picture will get a more realistic feel! Want to know how to add shadow to an object or person in Photoshop? Click here.
Thank you for your attention!
Summary
How To Add A Picture In Photoshop
Source: https://memorynotfound.com/insert-an-object-person-into-a-picture-photoshop/
Posted by: bentonshapithe.blogspot.com
0 Response to "How To Add A Picture In Photoshop"
Post a Comment